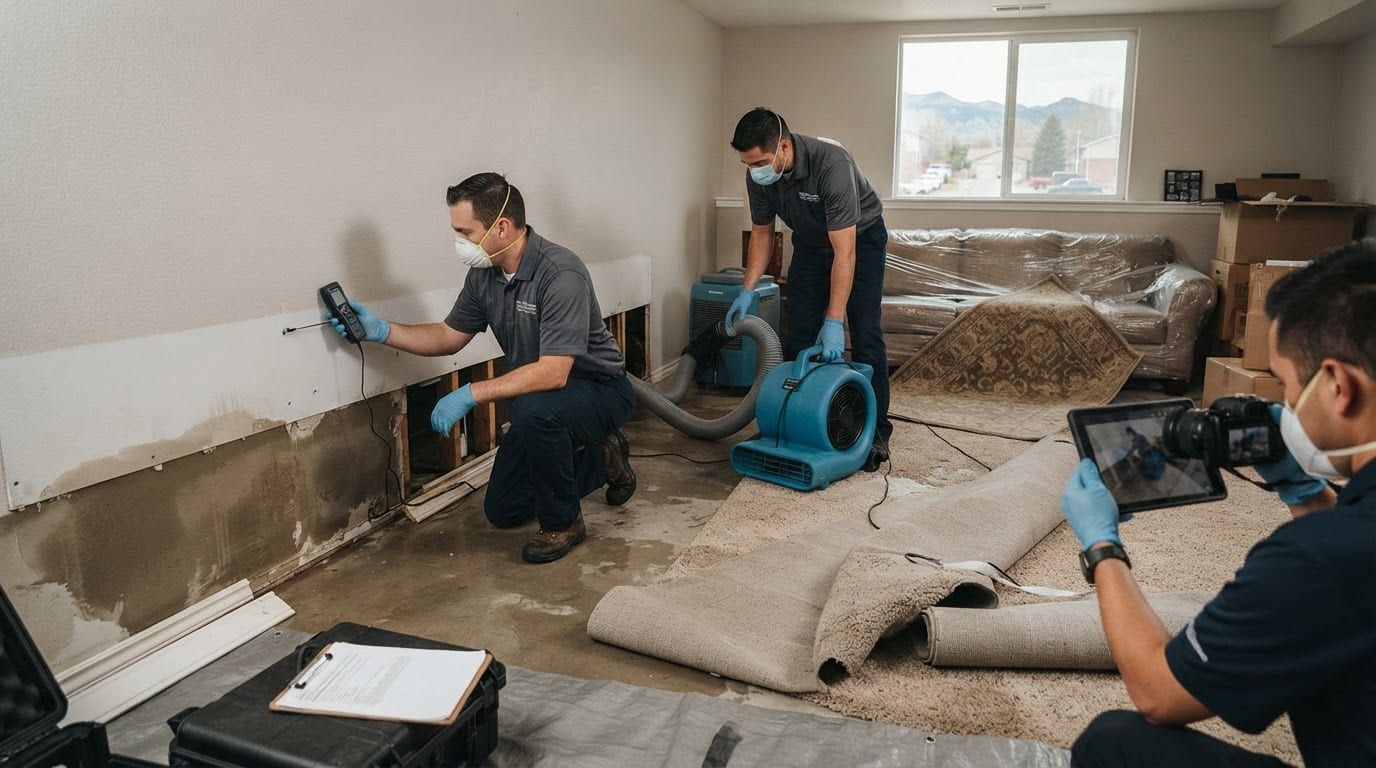
What Happens After Water Gets Inside a Denver Property
Water rarely stays where it lands. A supply line that fails behind a kitchen cabinet or snowmelt that seeps through a basement window can look contained for the first few minutes, yet within hours it has moved into subfloors, wall cavities, and insulation. What happens in that window often determines whether a loss becomes a contained cleanup or a much larger rebuild.
Homeowners searching for Water Damage Restoration Denver are usually facing the same urgent questions: who to call, what to move out of the way, and what the insurance company will expect. The answers depend on the water’s source, how long it has been present, and how the building is constructed. Denver’s semi-arid climate adds a complication. Indoor air is often dry, which speeds surface evaporation, but that same dryness can make a floor feel dry while moisture remains trapped beneath it or inside a wall.
Anyone facing a loss should first stop the water source if it is safe, shut off power to affected circuits when standing water is present, and photograph the damage before anything is moved. Sewer backups and water that has sat for more than a day should be treated as urgent. Crews who handle these losses regularly, including the technicians at Restoration Logistics Denver, follow a consistent sequence: assess, extract, dry, verify, and only then rebuild.
Why the First Hours Shape the Final Repair Scope
In the first 24 to 48 hours, three things change the damage. Standing water saturates materials that would otherwise dry in place. Wet drywall paper, carpet pad, and wood begin to swell and soften. Humidity generated by the water itself raises moisture levels in the surrounding air, which slows evaporation from materials that are still wet.
Three early risks drive most scope growth. The first is mold colonization. Organic materials such as paper-faced drywall, wood framing, and insulation can support mold growth within roughly 24 to 48 hours under favorable conditions, which is why the IICRC S500 standard for professional water damage restoration emphasizes rapid response. The second is subfloor swelling. Plywood and OSB at the subfloor level absorb water at their edges and can delaminate, while hardwood flooring cups as its boards absorb moisture unevenly. The third is wicking. Water moves upward through drywall and batt insulation by capillary action, often well above the visible waterline, so a wall that looks damaged only at its base may be wet several feet higher.
Speed affects what can be saved. Restoration Logistics states that its Denver crews typically reach most neighborhoods within about 60 minutes. Early arrival matters because hardwood that is dried before its boards set can sometimes return close to its original flatness, and cabinet bases or trim can be cleaned and dried instead of replaced. Each hour of delay generally narrows those options.
Mitigation Comes Before Any Repair
Mitigation is the set of actions that stop damage from spreading. It includes three separate steps with different goals. Water removal, or extraction, takes out free-standing water. Drying removes moisture from structural materials to reach target readings. Sanitizing addresses contamination, particularly when the water is not clean. Confusing these steps leads to problems, because a room can look dry while still holding moisture inside a wall.
On arrival, a technician checks three things. The first is the water source: a supply line, a drain, a roof leak, or flood water each carries a different risk profile. The second is the water category under IICRC S500. Category 1 water comes from a clean source, Category 2 has meaningful contamination, and Category 3 is grossly contaminated, such as sewage. The third is which materials can be dried in place. Solid wood, subfloors, and studs often can. Category 3 water usually requires removing porous materials such as carpet, pad, batt insulation, and drywall below the cut line. The technician also assigns a damage class, from Class 1 for minimal absorption to Class 4 for materials with low evaporation rates, such as hardwood, plaster, and concrete. That classification determines how much equipment is needed.
Extraction and Drying Equipment
Extraction typically begins with truck-mounted or portable extractors, followed by low-profile wands for carpet and pad. Once free water is gone, air movers are placed to create airflow across wet surfaces rather than just through the room. A common approach is to aim air movers along walls and floors at shallow angles, with spacing based on the affected area and the material. Dehumidifiers, usually low-grain-refrigerant units, remove moisture from the air, and in colder conditions, desiccant units can perform better. Because Denver’s air is already dry, technicians often rely on the local climate for part of the work, but they still measure results.
Drying targets are set for each material rather than for the room as a whole. Technicians compare affected materials against unaffected reference points, often a dry wall in the same home or a nearby material. Wood framing is typically dried toward a moisture content of about 15 percent, while drywall and other materials are assessed against their own reference readings. Equipment stays in place until readings reach those targets, which is why drying logs matter.
Moisture Mapping
Water that is not visible is the most common reason repairs fail. Moisture meters come in pin and pinless types. Pin meters measure electrical resistance at a probe tip and are useful for wood and framing, while pinless meters scan surfaces and are useful for drywall and finished flooring without leaving marks. Thermal imaging cameras detect temperature differences caused by evaporative cooling, which often reveal wet areas under flooring or behind baseboards. Hygrometers measure the moisture content of the air in grains per pound, showing whether the environment is still pulling water out of materials.
Technicians combine these tools into a moisture map that records readings by location and date. When a reading is unclear, they may remove a baseboard, drill a small inspection hole, or lift a floor transition to see what is behind it. The map becomes the basis for deciding when equipment can be removed.
Hidden Water in Denver’s Older and Finished Homes
Construction affects how water behaves. Plaster on wood lath holds water longer than modern drywall and can crack or detach from its base if dried too quickly, so it needs slower, more controlled drying with lower air velocity. Original hardwood flooring, common in many older Denver homes, cups and crowns as it absorbs moisture, and it often requires a longer drying schedule followed by sanding or refinishing. Modern drywall wicks water readily and loses its structural strength when saturated, which makes early removal of the lower section more important.
Homes built before 1978 add another consideration. Under EPA’s Renovation, Repair and Painting (RRP) rule, contractors performing work that disturbs paint in pre-1978 housing must be trained as certified renovators. Testing and lead-safe practices may affect demolition and the timing of repairs, so the restoration scope should account for them before drywall or trim is removed.
Finished basements present a different problem. Water can travel under carpet pad and luxury vinyl plank, move along the top of a concrete slab, and stay concealed behind baseboards and trim. A basement that looks dry at the surface may still hold moisture within the wall base and under the floor. Denver’s older neighborhoods, including Capitol Hill, Park Hill, Cherry Creek, and Washington Park, include both historic and newer construction, and the building’s age alone does not determine the outcome. A well-maintained 1920s bungalow and a 2010 townhome can end up with similar scopes if water remains in the structure long enough, and a carefully dried older home can recover well when moisture is measured and tracked from the start.
Documenting the Loss for Your Insurance Claim
Most property policies include a duty after loss that requires the policyholder to take reasonable steps to protect the property from further damage. Emergency mitigation, such as extraction and drying, is generally one of those steps. Acting promptly demonstrates that the owner followed the policy, but policy language varies, so owners should review their own documents and ask their agent about specific requirements.
Documentation gives adjusters a clear record of both the loss and the work. Timestamped photos taken before cleanup, during extraction, and during drying show the progression of the damage. Moisture readings and drying logs show what was measured, where, and when. Equipment placement diagrams show which air movers and dehumidifiers were used and for how long, which supports the daily equipment charges on an invoice. Adjusters often build their estimates in line-item software, so itemized invoices that match the drying logs make review faster.
Practical habits help owners protect their claim:
- Keep every receipt, including temporary repairs, hotel stays, and food costs related to displacement.
- Avoid discarding damaged materials before the adjuster inspects them, unless a safety hazard requires removal. In that case, photograph and label what was removed.
- Ask the contractor for an itemized invoice that lists equipment, labor, materials, and the dates of service.
- Request copies of moisture maps and daily drying logs.
Questions Denver Property Owners Ask About Timelines, Costs, and Payment
How long does drying take?
Structural drying commonly takes three to five days, though complex losses in dense materials or large basements can run longer. The schedule depends on the damage class, the materials involved, the extent of wetting, the air movement and dehumidification in place, and whether the work proceeds without delays. Drying ends when moisture readings reach the targets set for each material, not when a fixed number of days has passed.
Why does repair start after equipment is removed?
Reconstruction over wet materials traps moisture inside new drywall, flooring, or insulation, where it can cause mold, staining, and adhesive failure. Repairs usually begin only after the drying targets are confirmed. Some preliminary work, such as demolition of materials that cannot be saved, can proceed while equipment is still running.
What is the difference between mitigation and reconstruction?
Mitigation covers emergency work to stop the damage from spreading, including extraction, drying equipment, moisture monitoring, and sanitizing. Its costs are usually billed by the day for equipment and by labor hours, and a typical residential mitigation event often falls within a few thousand dollars. Reconstruction covers the permanent repair, such as replacing drywall, flooring, cabinets, and trim. Reconstruction is typically priced from a line-item estimate and can range from several thousand dollars to well over $20,000 depending on scope. Owners should expect these to be separate phases with separate invoices.
Denver requires permits for structural, electrical, and plumbing repairs through the Denver Department of Community Planning and Development. Owners should confirm that the reconstruction contractor pulls the required permits and that licensed trades perform regulated work.
How do residential and commercial projects differ?
Commercial projects add business interruption concerns. Many commercial policies include a waiting period before business income coverage applies, often 72 hours, so owners should confirm their terms before work begins. Occupied spaces require planning. Crews may use containment barriers, HEPA air scrubbers, and negative air pressure to limit dust and odors, and they may schedule loud work after hours or phase the project so parts of the facility stay open.
How are payments usually handled?
Many restoration companies bill the insurer directly under a direction-to-pay arrangement, which can reduce upfront costs for the owner. The owner is still responsible for the deductible and any amounts the policy does not cover. Some providers also offer financing for uninsured or out-of-pocket portions. Financing terms, interest rates, and fees should be reviewed carefully before signing.
Before work begins, owners should ask:
- Are your technicians certified under IICRC standards, and do you hold the required Colorado and Denver licenses?
- Do you carry liability insurance, and can you provide a certificate?
- Will you provide a written estimate and daily moisture and drying logs?
- Who approves changes to the scope, and how will I be notified of them?
- Do you bill my insurer directly, and what is my share of the cost?
- What are your equipment rates, and how are they calculated?
- Which permits will be needed for reconstruction, and who will pull them?
Clear answers to these questions set expectations on both sides and make the rest of the process easier to manage.